

How to Add Assets to Media Library After Ftp Upload
Downloading your WordPress media library is a quick and easy process, which tin can be completed in a number of different ways. In this article, we await at 3 methods that volition enable yous to download your media library with minimum fuss. These include:
- Install the Export Media Library plugin.
- Utilise File Manager in cPanel.
- Download via FTP.
Each method is a great option — simply cull the 1 that best matches your skillset. Let's go started.
Export Media Library is a gratis WordPress plugin that enables users to export media library files as a compressed cipher archive. Then let'south have a wait at how to install and fix this useful plugin, and use information technology to download your WordPress media library.
Footstep 1: Install Export Media Library
To install Consign Media Library on your website, open your WordPress dashboard and select Plugins > Add New.

Hither, type 'Export Media Library' into the plugin search bar at the top of the page.
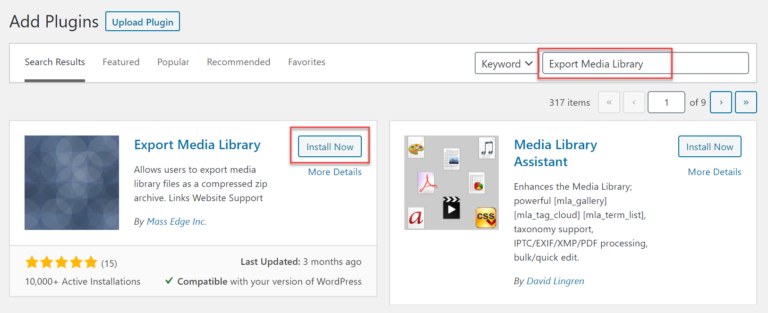
Once the plugin has been retrieved, click on Install Now then Activate.
Step two: Configure the Plugin Settings
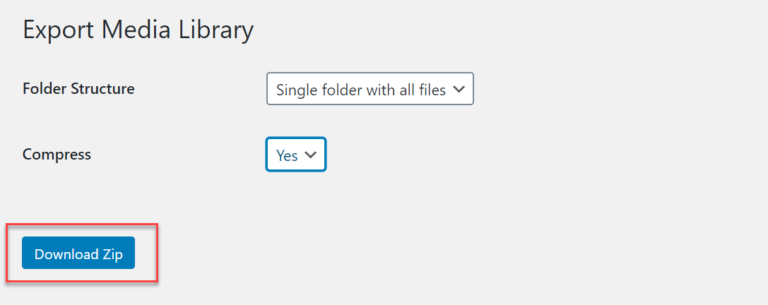
Once the plugin has been installed, click on the Media > Consign bill of fare. This will take you to the Export Media Library Settings page.

In that location are a couple of settings y'all will need to configure:
- Folder Structure – Choose whether you want your WordPress media library downloaded in one folder or a number of nested folders.
- Compression – Select whether to compress your WordPress media library before downloading the cipher file. Opting for pinch will subtract the size of the nothing file, but it does require more processing on the server. We would recommend enabling compression.
Step three: Download your WordPress Media Library
Once yous have configured the plugin's settings, merely click on Download Zip.
Your WordPress media library will now download to your computer, enabling you to proceed the file safe and secure.
Utilise File Manager in cPanel
If you would rather non utilise a WordPress plugin, and you have access to cPanel via your hosting provider, then using the File Managing director in cPanel to download your WordPress media library may exist the right method for you.
cPanel is a powerful platform that provides a range of impressive tools and gives y'all further control over your WordPress website. One of the key features is the File Manager tool, which will enable you to manage and edit the files of your site. It is from within the File Managing director that you tin shrink and download your media library.
It is worth pointing out that not all hosting providers utilise cPanel, and the features and layout of cPanel tin change depending on the hosting plan you use. For this article, I will demonstrate downloading the WordPress media library via SiteGround's cPanel. Let's have a look.
Step i: Open cPanel and File Manager
Log into your hosting business relationship and open your cPanel.
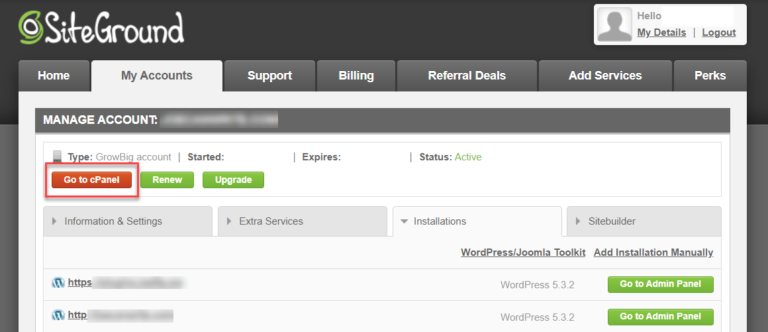
Within the cPanel, click on File Manager, which is ordinarily establish in the Files section.

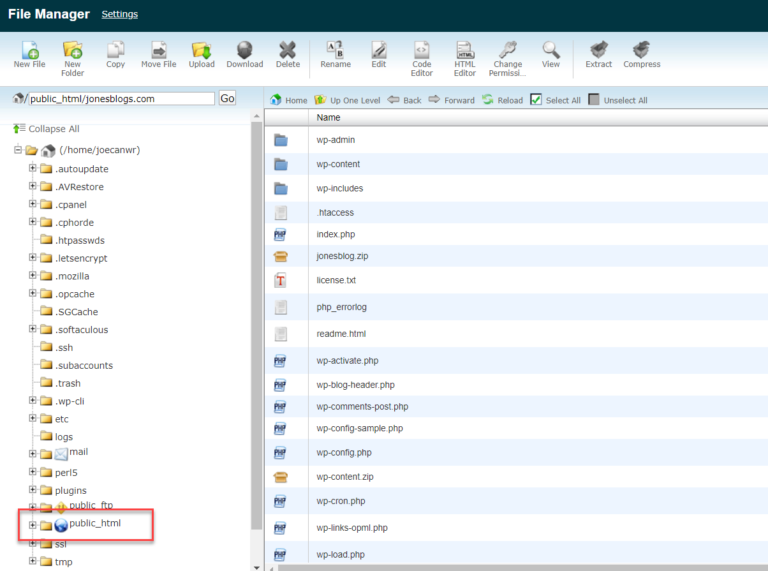
Now double click on the public_html folder to access your website'southward directory.
Footstep two: Compress the Uploads Binder
You at present need to find and compress your site's uploads folder, which is where your media library is stored. To do and then, scroll down and find the wp-content folder.

Side by side, you need to select the uploads folder and then click on Compress icon from the top menu.
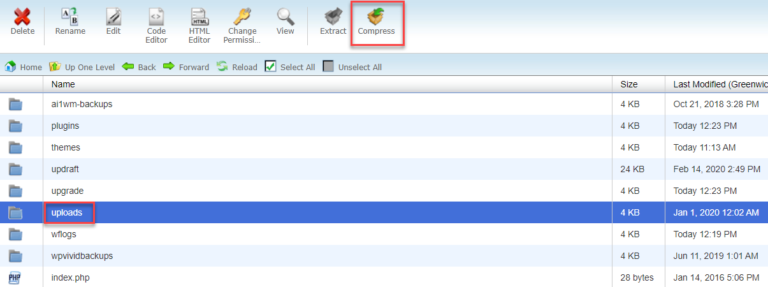
A popup volition now appear, asking yous how you lot would like to shrink your uploads binder. We recommend selecting the Naught Archive selection.

SiteGround will at present display Compression Results, which simply shows you all the files that have been compressed and the percentage they take been compressed by.
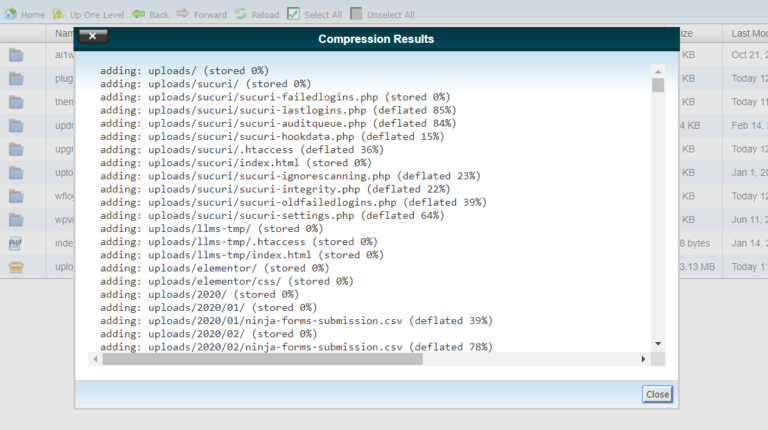
Curl down to the bottom of the results and press Shut.
Step three: Download the Uploads Folder
Once the uploads binder has been compressed, it is ready for downloading. To exercise so, select uploads.null from the list of folders and so click on the Download icon found in the meridian menu.

Your uploads folder, which contains your WordPress media library, will now download to your desktop.
The third option we will talk over is using File Transfer Protocol (FTP) to download your WordPress media library. With this method, you lot will demand to download an FTP customer, but you volition not need to use a WordPress plugin, or go through your hosting account.
FTP gives yous direct access to your website's files from your computer, without the utilise of a browser. There are numerous FTP programs you lot can use, but we would recommend FileZilla, a popular and user-friendly FTP customer that works on Windows, Linux, and macOS.
And so let's now detect out how to set upwardly Filezilla Customer and download your WordPress media library via FTP.
Step 1: Install and Gear up Up FileZilla Client
The first step in this process is to install FileZilla Client on your estimator. To practice and then, open the FileZilla Projection website and click on the Download FileZilla Customer button.

Follow the install instructions that appear on your screen to complete the FileZilla installation and setup procedure.

Step 2: Establish an FTP Connectedness
FileZilla will at present inquire you lot to constitute an FTP connection with your website's server.

To do so, you will demand to enter your:
- Host (FTP server name)
- Username (FTP username)
- Password (corresponding FTP countersign)
- Port (FTP port)
If you lot are not sure on this information, you lot will need to log into your cPanel and open the FTP Accounts folder.

Here, you tin can access all the FTP info that y'all need, every bit well as set a new FTP password if necessary.

In one case you have copied this information into FileZilla Client, click on Quickconnect.

FileZilla will at present establish an FTP connection, at which point you can begin the procedure of downloading your media library.
Stride 3: Transfer Your Uploads Folder
Within the FTP customer interface, from the Remote site panel, select the wp-content folder.

Then, click on the uploads folder and elevate it into your Desktop binder, or another folder located in your Local site panel.

Your website's uploads folder, containing the media library volition now transfer to your figurer.
Downloading your WordPress media library is a straightforward process, whichever method you choose. Whether you want to keep an actress copy of your media library for safety purposes or transfer your images to some other site, you tin chop-chop complete this procedure with any of the above three options.
Any questions on how to download a WordPress media library? If so, please feel free to ask abroad in the comments below.
Searching for a free, professional and lightweight WordPress theme? Meet Sydney!
View Theme
Source: https://athemes.com/tutorials/download-wordpress-media-library/
0 Response to "How to Add Assets to Media Library After Ftp Upload"
Post a Comment